Introduction
Asset Policies allow you to define rules that automatically take actions on assets in your ProjectDiscovery Cloud inventory. Policies evaluate asset properties against defined conditions and perform an action when those conditions match. Supported actions include:- Sending notifications to configured channels (e.g., Slack, Microsoft Teams, etc.)
- Deleting assets
- Adding labels
- Removing labels
Why asset policies matter
As your asset inventory grows, it becomes harder to notice the changes that matter. New assets get discovered, existing assets change, and risky patterns can appear without anyone looking at the dashboard at the right time. Asset policies can help detect scenarios like:- A new admin panel getting exposed
- A sensitive port becomes reachable
- A host starts returning
401/403 - An unexpected technology appears
- CDN-backed hosts cluttering production views
- Placeholder or noisy assets keep getting added
Walkthrough
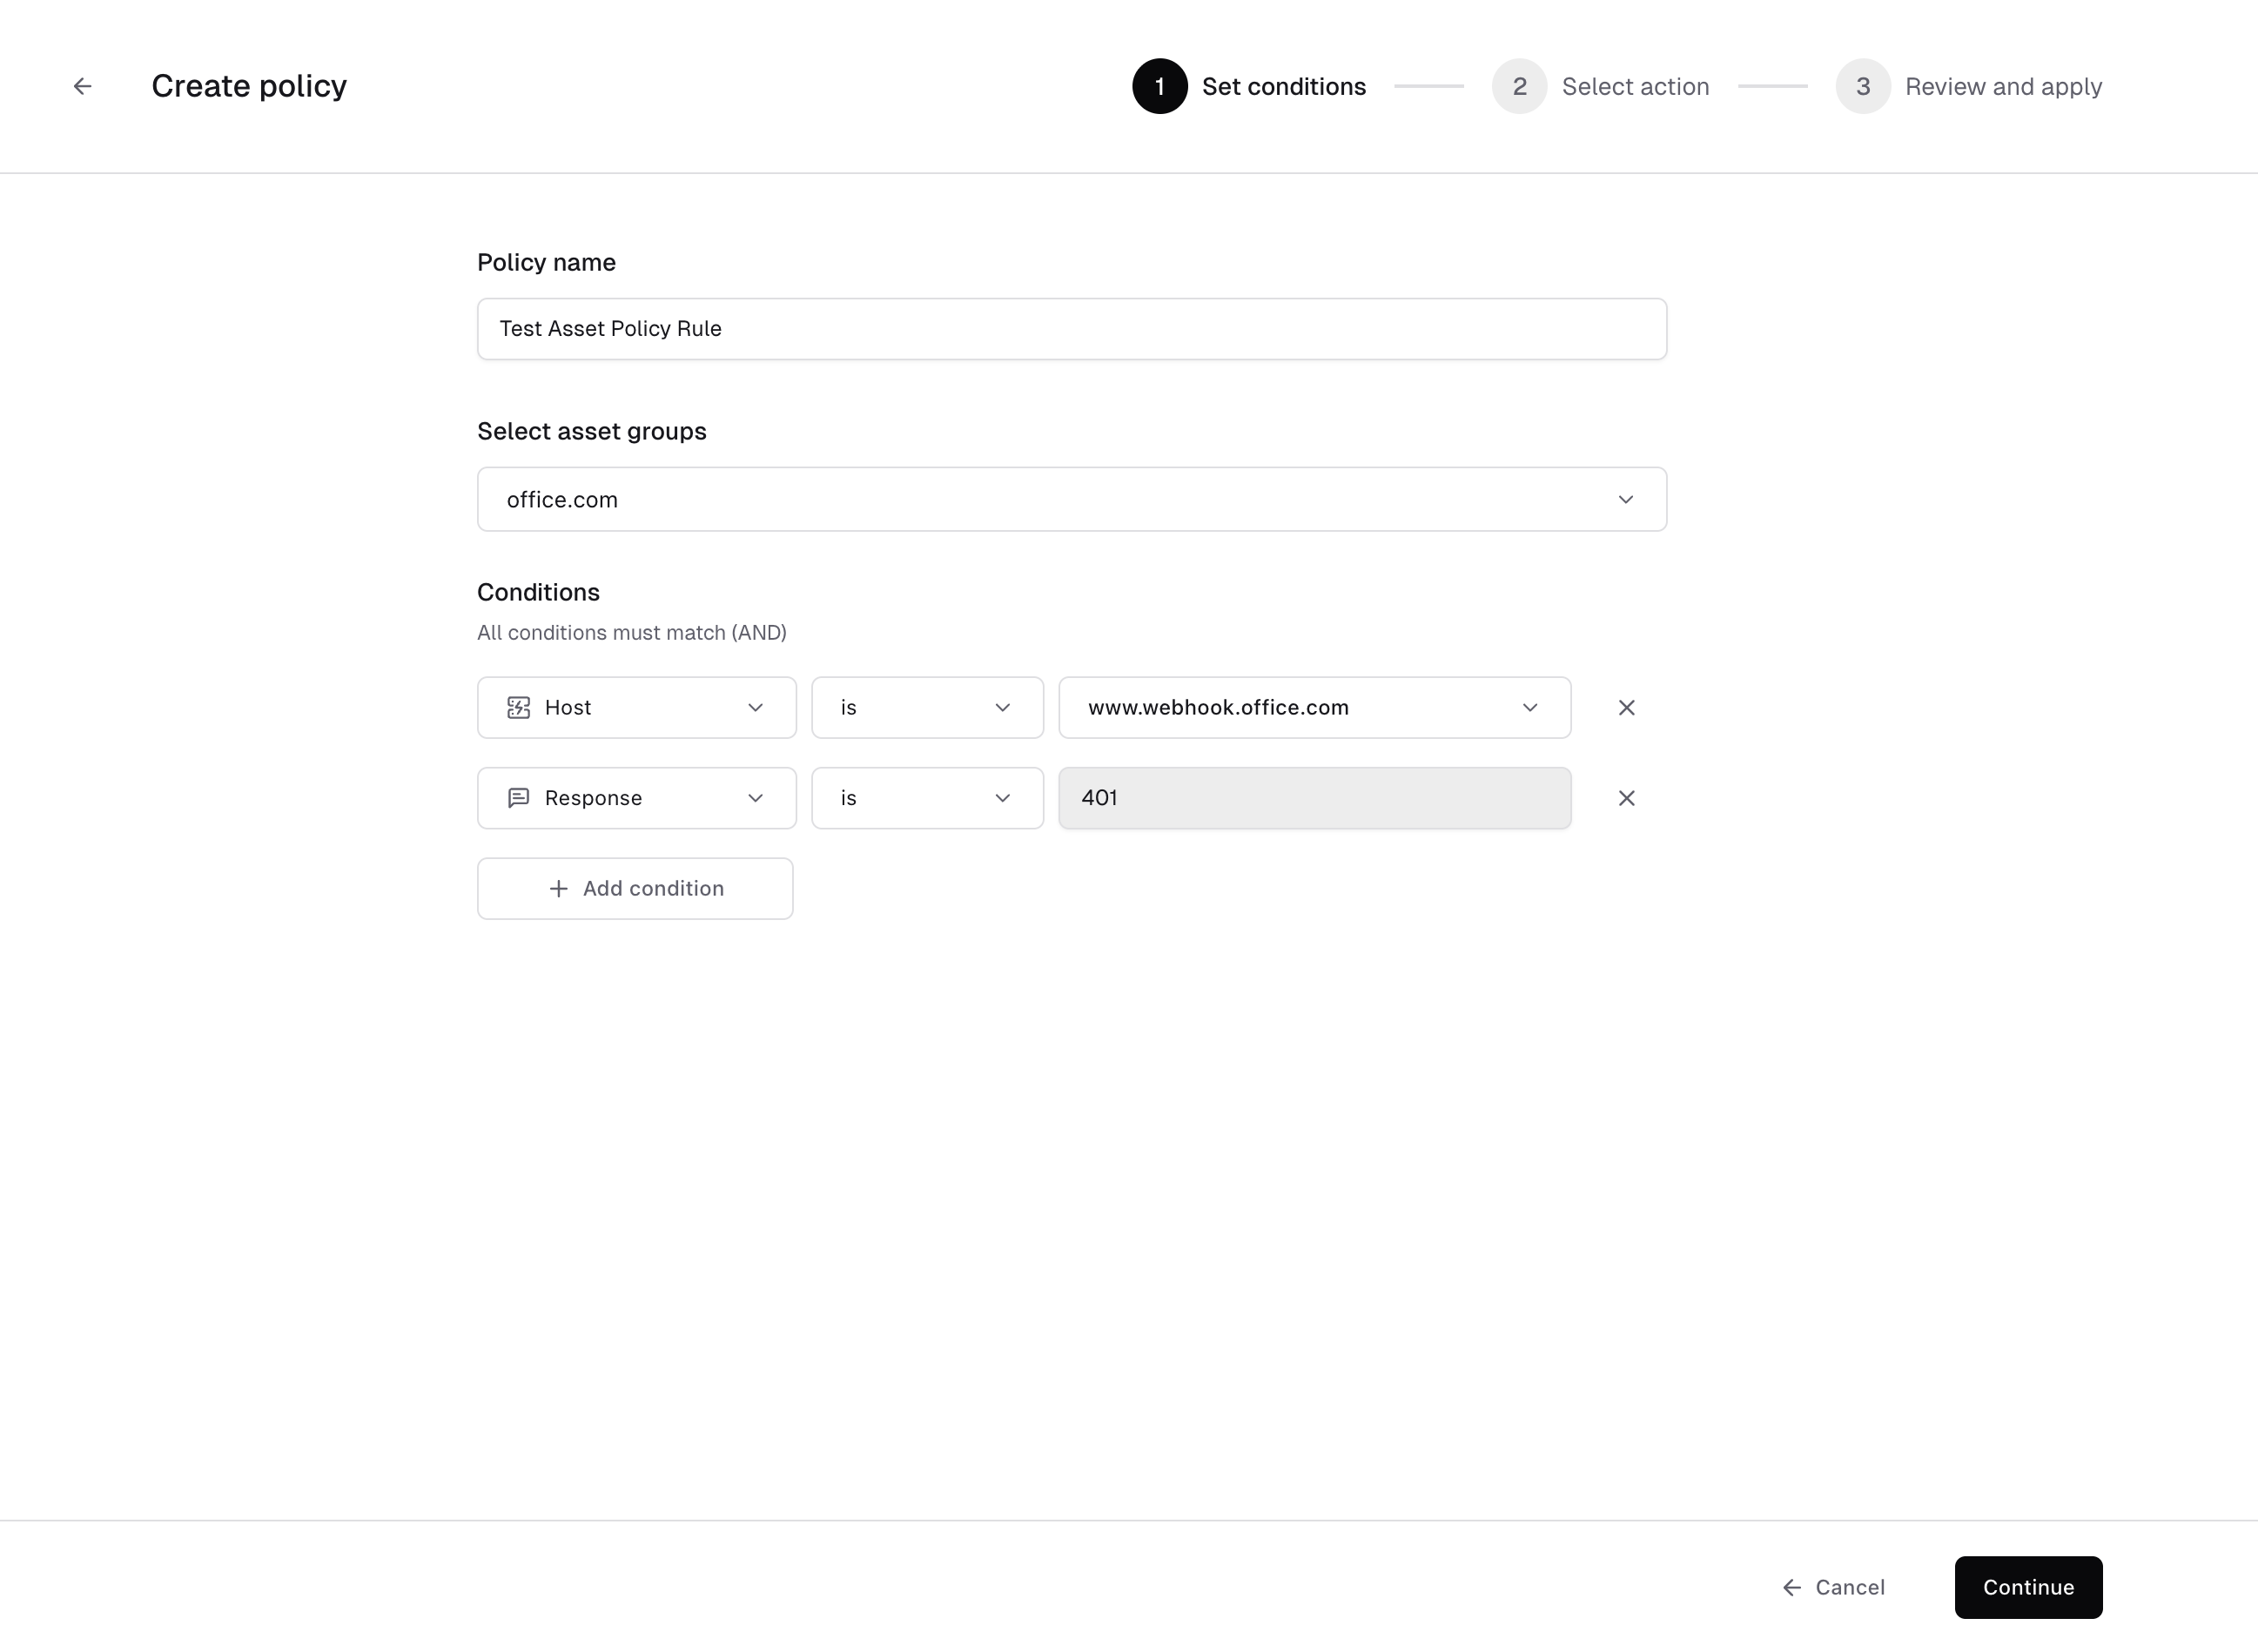
To get started navigate directly to: https://cloud-dev.projectdiscovery.io/assets/policies or you can visit the Policies tab in the Inventory or Asset Groups pages. Let’s dive in to the details with the help of an example scenarioYou manage the office.com asset group.You’ve identified that subdomains under
www.webhook.office.com returning HTTP 401 are misconfigured endpoints that should not exist in inventory.You want to:- Automatically remove these assets
- Ensure future occurrences are handled without manual review
- Host is
www.webhook.office.com - Response is
401
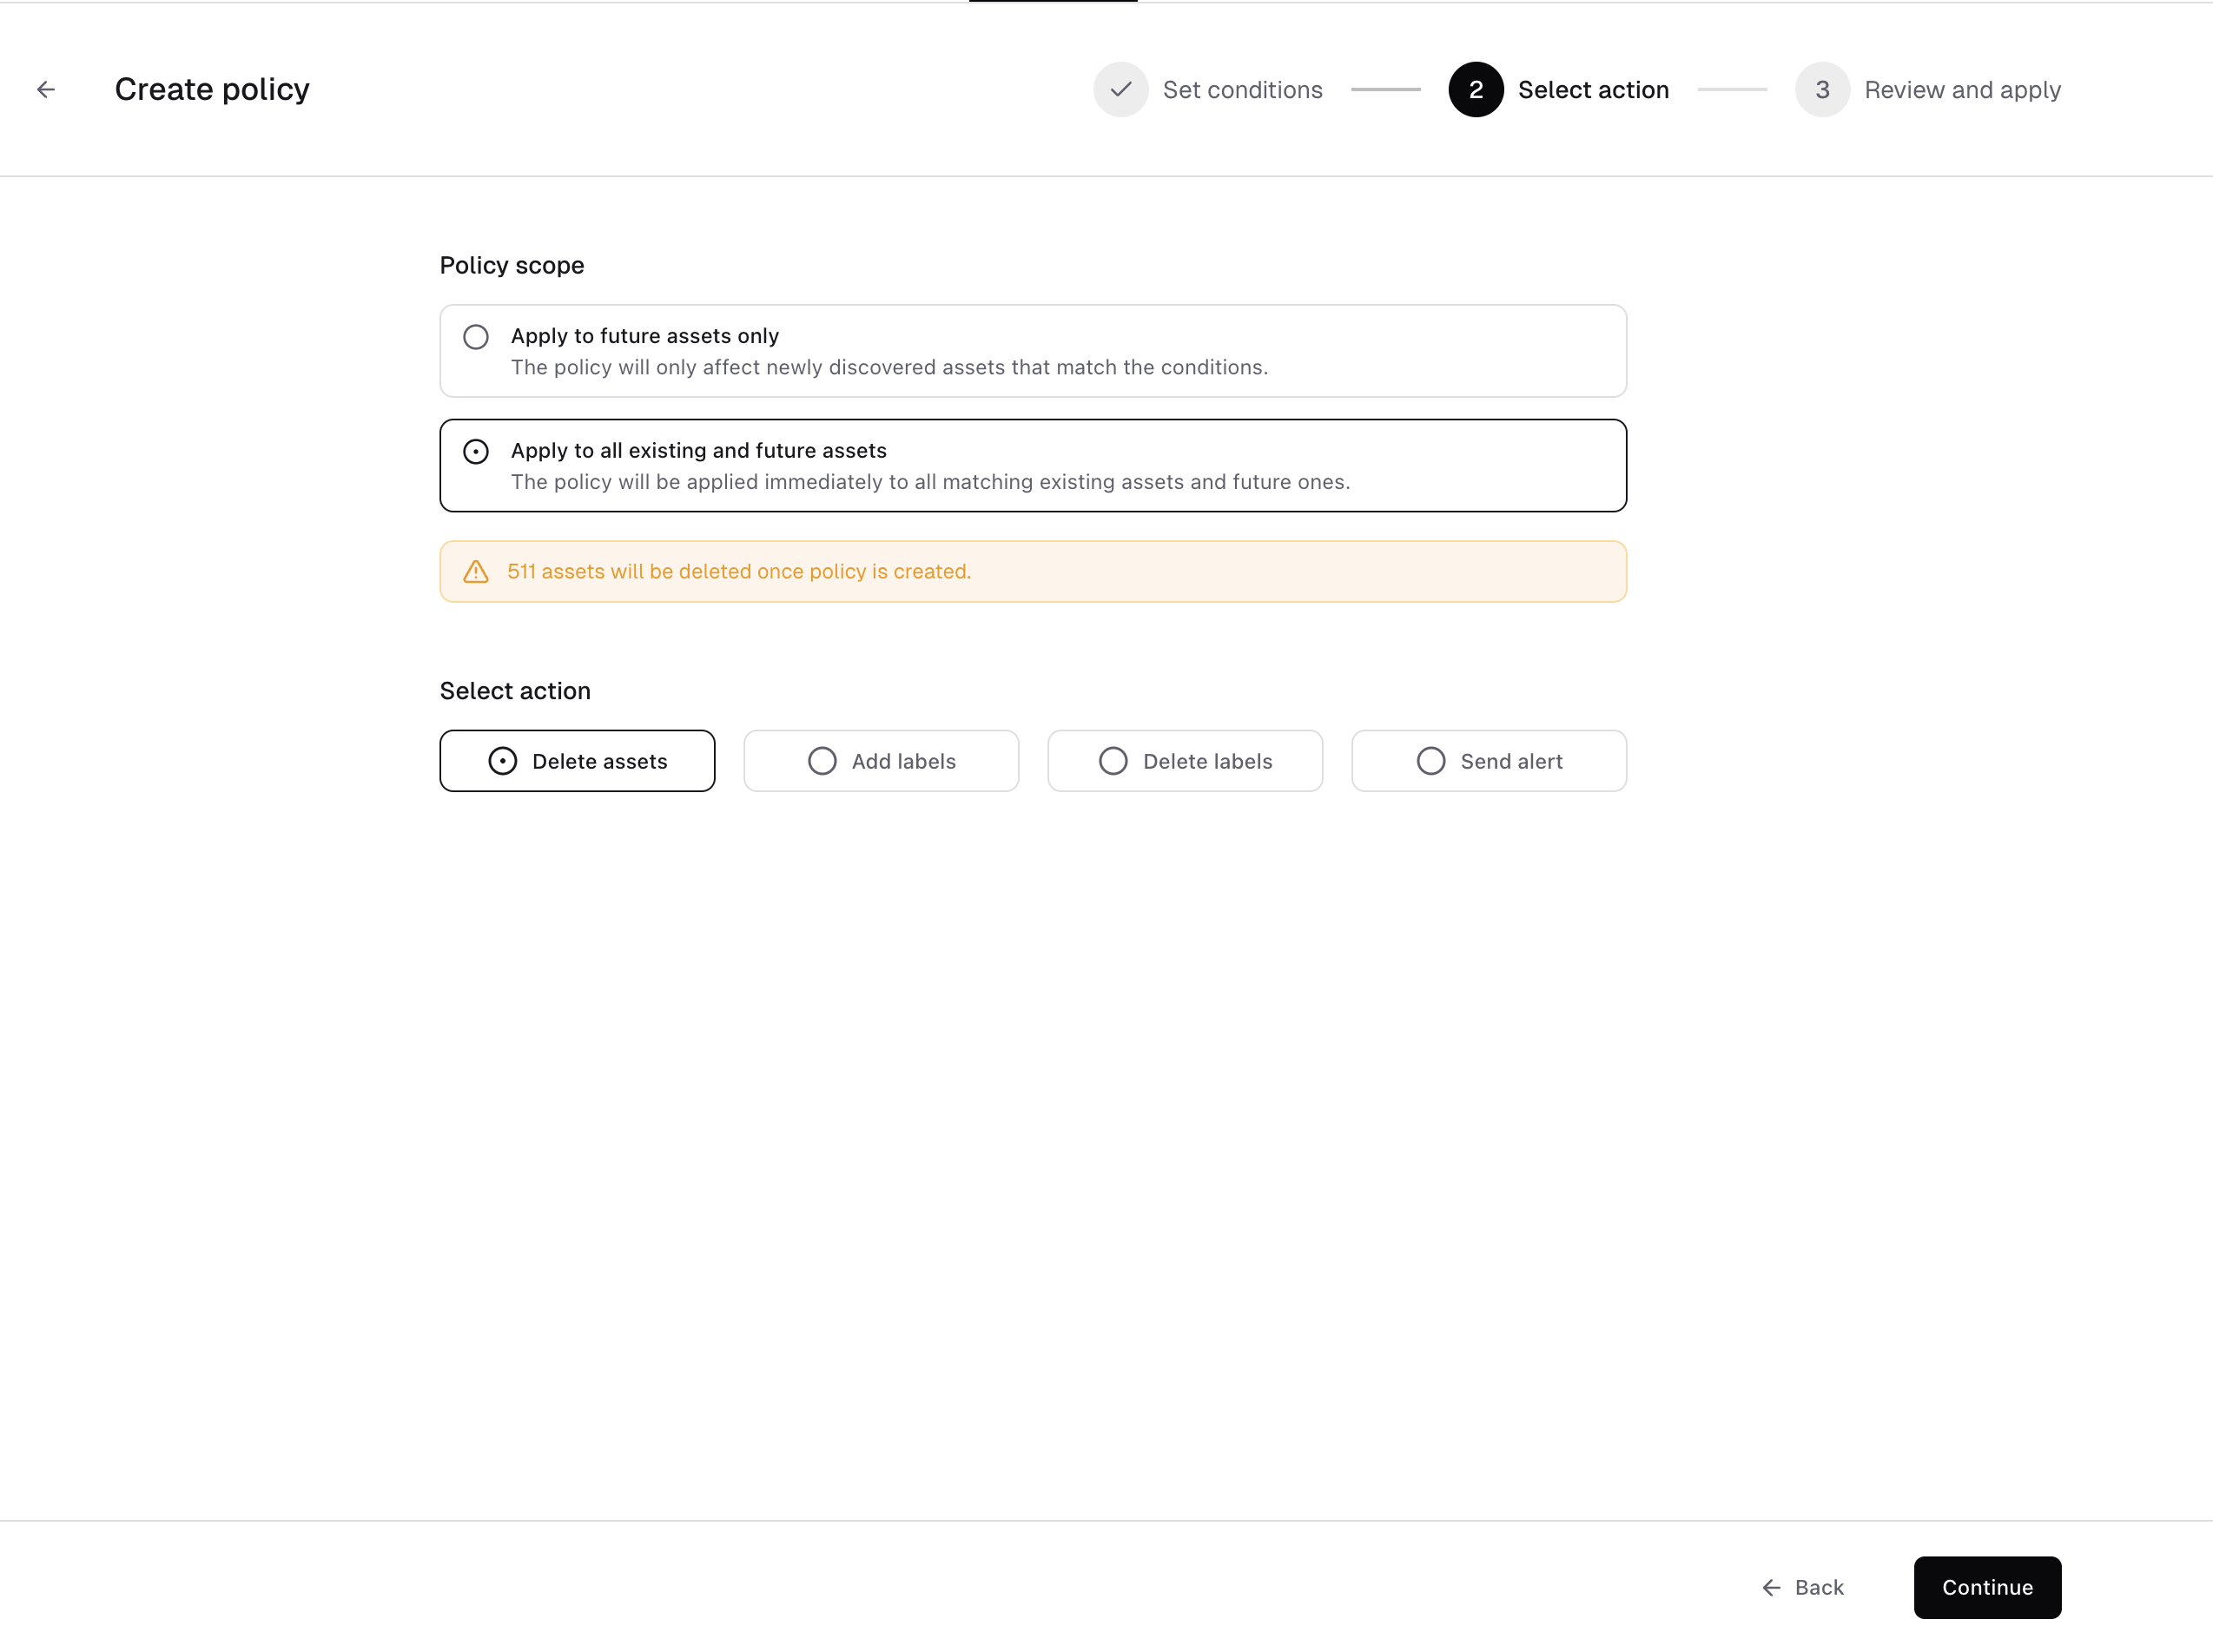
- Policy scope: Apply to all existing and future assets
- Action: Delete assets
www.webhook.office.com returning 401 are automatically deleted.
- Add labels - Automatically classify matching assets
- Delete labels - Remove outdated or incorrect classification
- Send alert - Notify your team when matching assets are discovered or updated
- Instead of deleting
401hosts, you could label them asunauthorizedfor review. - Instead of modifying the asset, you could trigger a Slack alert for investigation.
- You could automatically tag all WordPress installations with a
cmslabel.
- Clean up your inventory (delete assets or remove labels)
- Organize assets (add labels)
- Get notified when something matches (send alerts)
- The asset group selection is correct
- The conditions match what you intend
- The action is correct (especially if delete action is selected)
- The scope is correct (future-only vs existing+future)
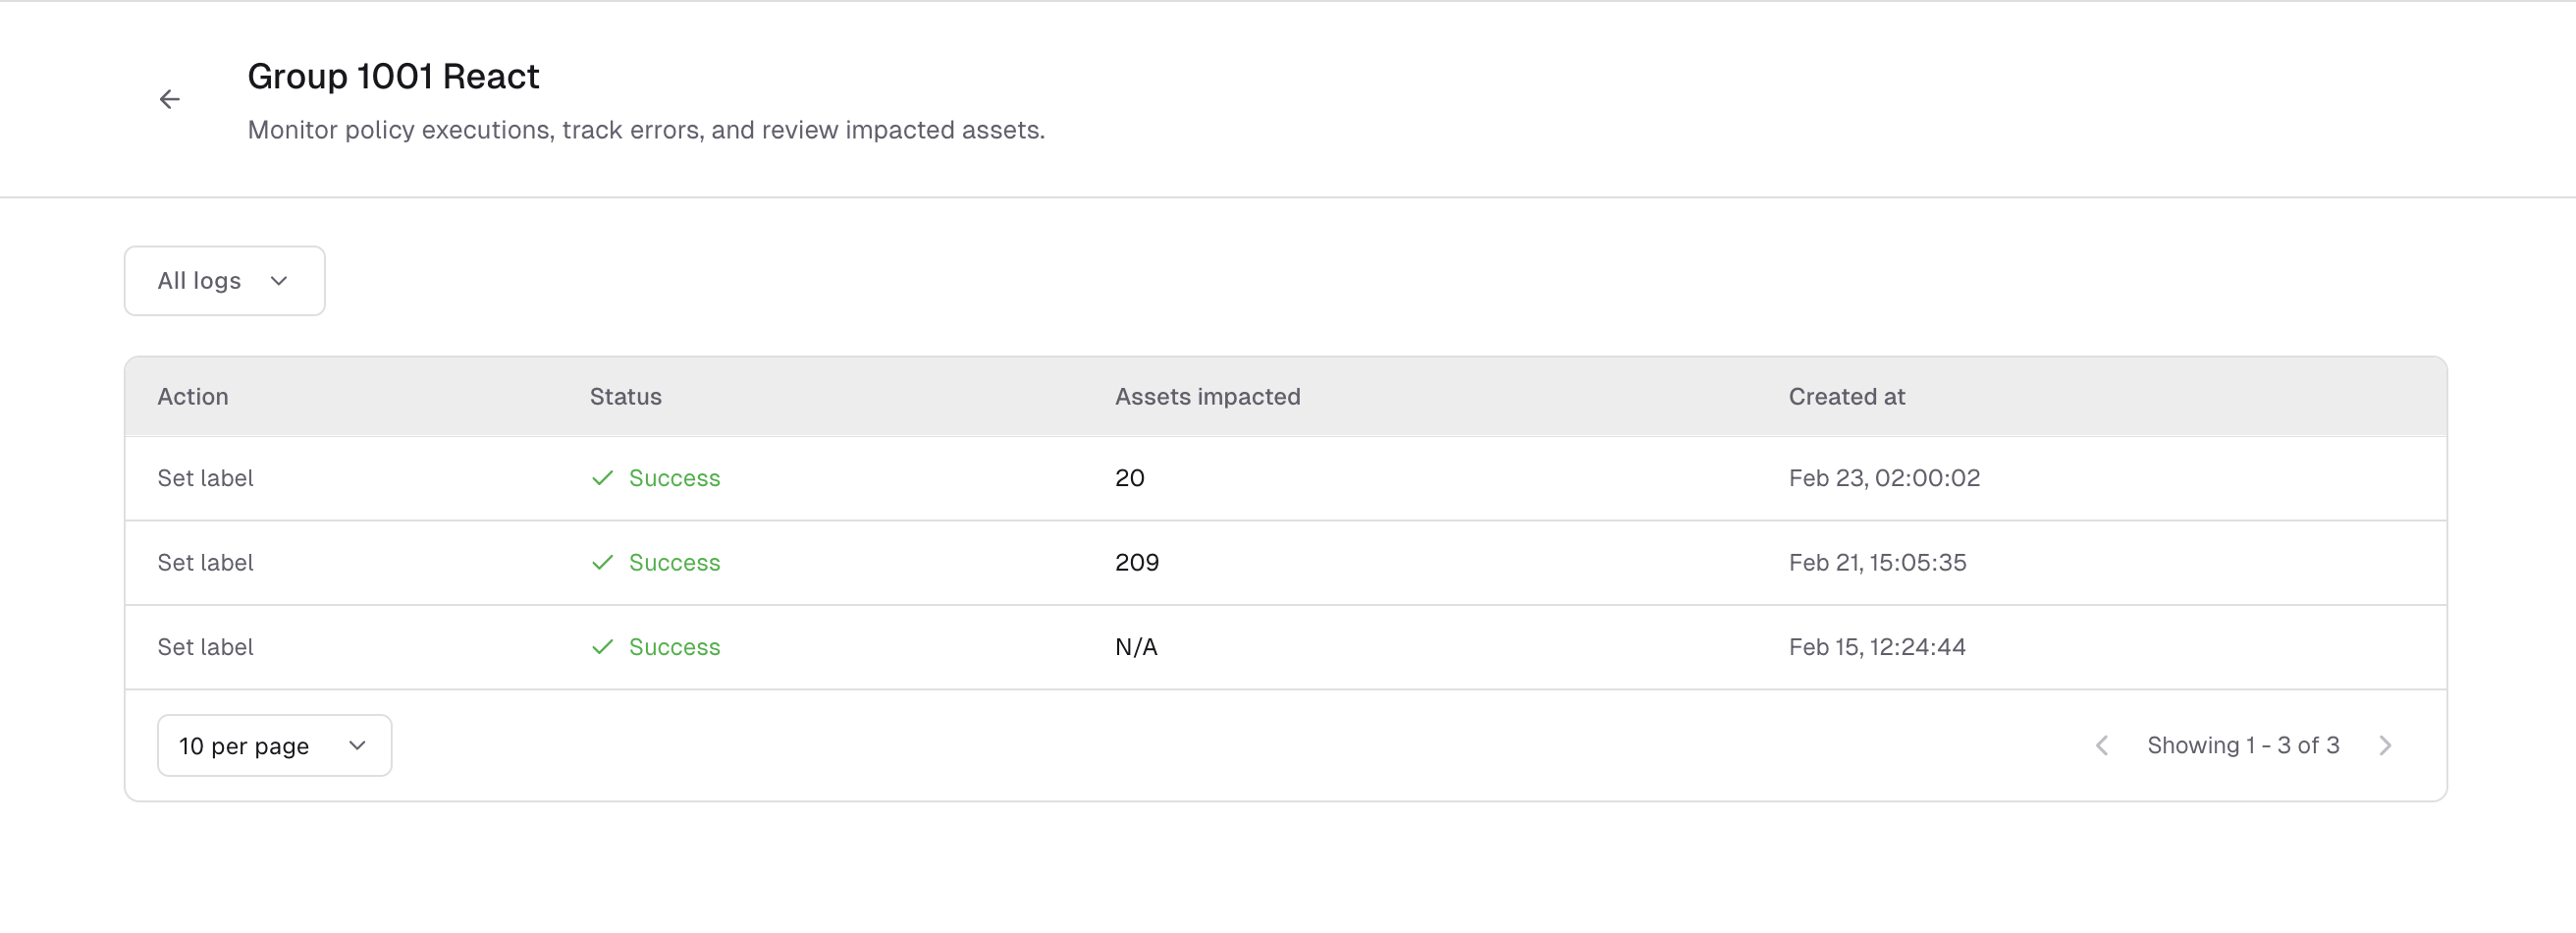
Tracking policy executions
Every time a policy runs, the action is recorded. You can view execution details from the policy page. The execution log shows the action, status of a particular policy run, number of impacted assets and timestamp. This helps you:- Confirm that the policy is working as expected
- See how many assets were affected
- Review past activity for audit or troubleshooting